Example 2: Test case for counter with global/external variable
This example illustrates how to create and execute a test for the function block myFB provided by the following ST-code:
|
In case of count ≥ 0, the result of myFB is the sum of both input values. In case of count < 0, the result is the product of the both input values.
In contrast to example 1, here the function block myFB contains an →external variable that is to be tested. The corresponding →global variable is located in the program Counter that is not tested.
How to test the above function block myFB:
-
Create the test suite for
myFBby using the command Create Test Suite. Details: See "Creating a test suite".
Result: The test suite filemyFB.testand the Excel filemyFB.xlsmare created in the same folder as the ST-object. -
Open the Excel file, enter the test data in the existing worksheet
test myFBand save the modified Excel file.
The worksheet already contains the columns for the variables delivering the input data. Here these columns arein1,in2andcount.OUTis the only column for the outputs (= expected results).
You decide how many test sequences and which test data you define for the test. This example uses the following test sequences and test data: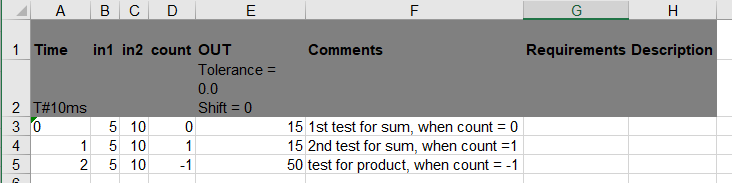
 The Excel file also contains other worksheets that are not used in this example. See "Structure of the Excel test suite, modifying the worksheets" for information on these worksheets.
 -
Transfer all test data from the Excel file to the test suite file
myFB.testby importing the Excel file. Details: See "Create the test suite based on the Excel file for the test execution". -
Have the tests executed, e.g. run a SiL-test with coverage. Details: See "Executing the test".
Result of the test execution: The console displays the progress and the result of the test execution.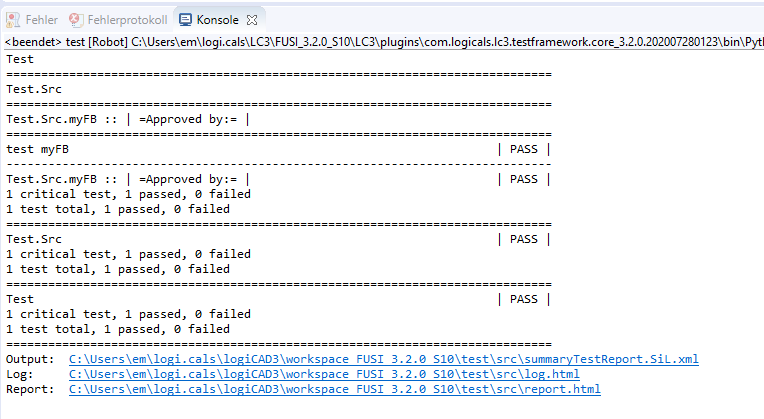 If error messages are displayed, a different version of Neuron Power Engineer might be started and/or the application might have already been loaded onto the PLC. See "Executing the test" for the necessary steps.
 -
Check the test execution. Details: See "Checking the test execution".
In case of a SiL-test with test coverage, you are able to have the test coverage displayed within the editor. The following test coverage is displayed for the example: Actually, 2 test sequences in the test would have been sufficient for a full test coverage of the
 IFstatement. See "Test coverage displayed within the editor" for details.