How do I activate licenses for the development environment?
This article is valid for →CmDongles as well as →CmActLicenses.
Make sure to activate the CmActLicense only on the computer where you want to use logi.CAD 3. Reason: CmActLicense licenses are bound to hardware properties of the computer.
Preparations
Download the necessary →CodeMeter-Runtime for the appropriate operating system from this website: https://www.wibu.com/support/user/downloads-user-software.html
Install this CodeMeter-Runtime.
If you are using a CmDongle: Attach the CmDongle to the USB port.
Recommended: Online activation via website
The online activation via the website is the fastest method to activate your license.
Activating a new license
Have the required ticket ID ready. Syntax of the ticket ID: XXXXX-XXXXX-XXXXD-XXXXX-XXXXX
Usually, the ticket ID is quoted on the invoice for the license. If you do not have a ticket ID, contact logi.cals (e-mail address: support@logicals.com) or the company from which you received logi.CAD 3.Start the web browser and change to this web page: http://license.logicals.com
Result: The web page with the CodeMeter licence WebDepot is displayed: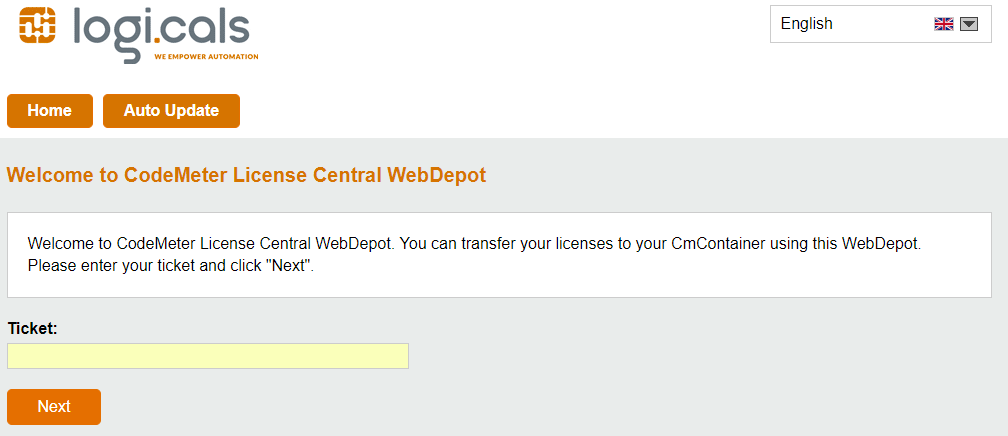
If necessary, change the language for the web page (command on the right top).
Enter the ticket ID under Ticket and click Next.
On the next page that displays the available licenses, click Activate Licenses.
On the next page, click the license variant for which you want to activate the license. It is either a →CmDongle or a →CmActLicense.
On the next page, select the den CmContainer from the list under Select CmContainer. Then click Activate Selected Licenses Now.
Check the displayed pieces of information to make sure that the license is successfully activated.
Updating an existing license
Start the web browser and change to this web page: http://license.logicals.com/autoUpdate.php
Result: The web page with the automatic license update is displayed: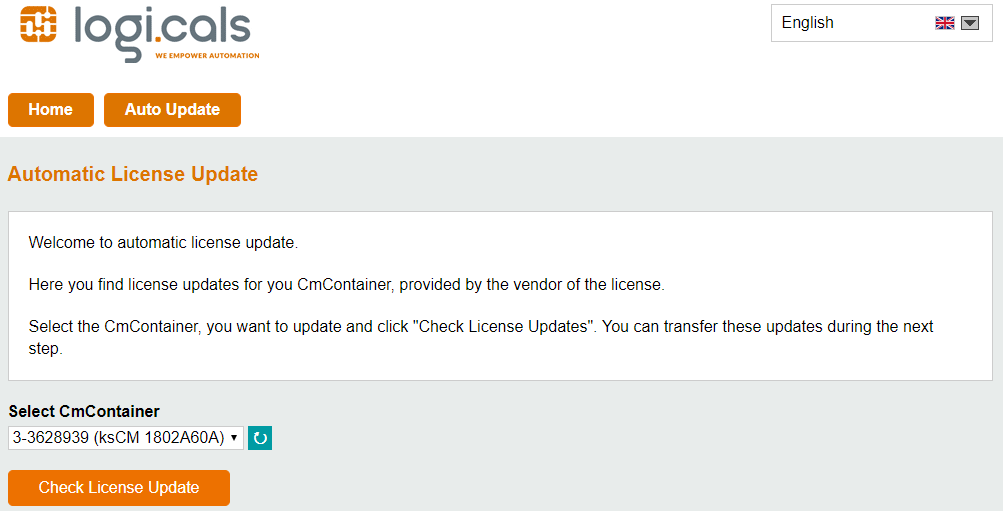
If necessary, change the language for the web page (command on the right top).
Select the CmContainer from the list under Select CmContainer. Then click Check Licenses Update.
Result: You will see a list of the available updates.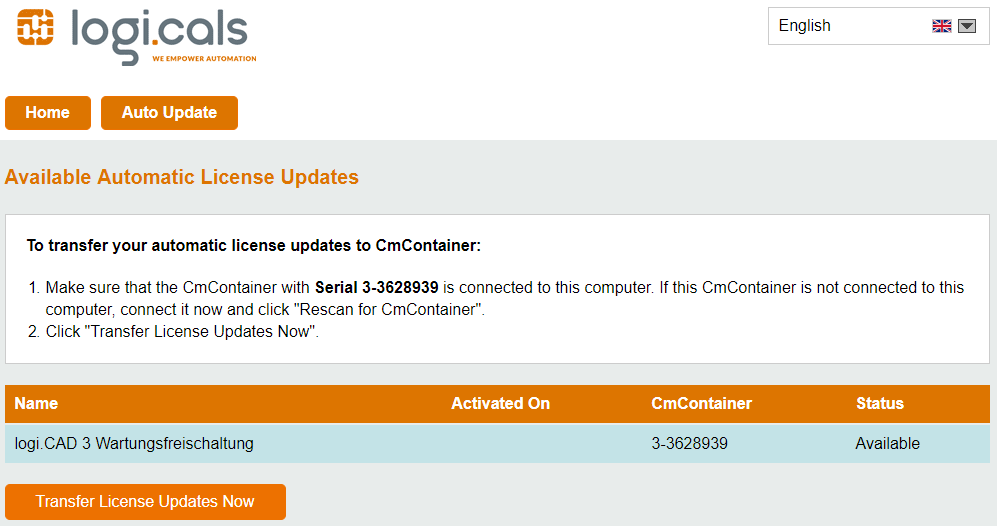
Click Transfer License Updates Now.
Check the displayed pieces of information to make sure that the license was successfully activated.
Offline activation
If you prefer to not activate the license via the website, proceed as described in this section.
Requesting a license (= importing an empty license)
Open the CodeMeter Control Center, e.g. by double-clicking icon
 that is visible on the Windows-taskbar after the installation of CodeMeter-Runtime.
Check whether the field under License already displays an item matching a logi.cals license.
If there is no such item and you are using CmActLicense as licensing, you have to import the license information file logi.cals_Softlock.wbb. This file corresponds to an empty license that collects the hardware properties of your computer as a kind of "finger print".
Best practice is to double-click the file logi.cals_Softlock.wbb that is included in the download package. Alternative, if the import by double-clicking is not successful:In menu File of the CodeMeter Control Center, select the command Import license . In the dialog, select the license information file logi.cals_Softlock.wbb and click Import.
Now the field under License displays an item. The CodeMeter Control Center indicates that this file is an empty license. At the same time, the CodeMeter symbol changes to .
.Create the update file for the license as described in the following.
If there is an item for a logi.cals license, create the update file for the license:
Note: Usually an item is displayed, if a CmDongle of logi.cals is used, the CmActLicense has been updated previously or the license information file has been imported.In the CodeMeter Control Center, select the item under License, then click License Update.
Here an illustration of the German CodeMeter Control Center: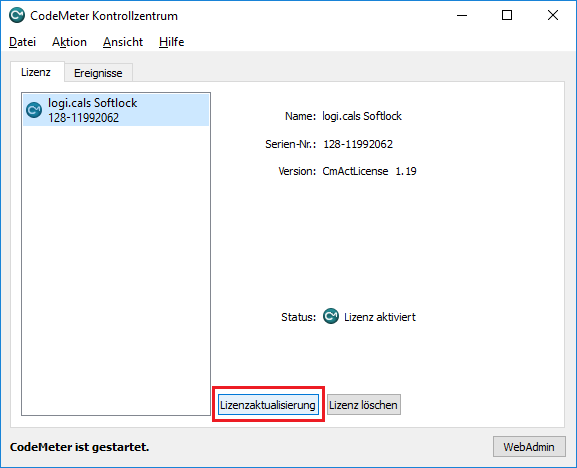
In the next dialog, click Next >. Then select Create license request and click Next > again. Select a target folder and click Commit in order to create a license update file *.WibuCmRaC.
Send this file to logi.cals, in particular to this e-mail address: support@logicals.com.
Activating the license
After you have got the license update file *.WibuCmRaU from logi.cals, activate the license.
Best practice is to double-click this file.
Alternative, if the activation by double-clicking is not successful:
Open the CodeMeter Control Center again.
Select the item under License again, then click License Update.
In the next dialog, click Next >. Then select Import license update and click Next > again. Select the license update file *.WibuCmRaU and click Commit.
The CodeMeter Control Center indicates that this file has been activated. At the same time, the CodeMeter symbol changes to and the license has got a serial number. Now you are able to start logi.CAD 3 and use the license.
![]() logi.cals
recommends to install and use the most current versions of
logi.CAD 3
and the runtime system so that the latest features and problem fixes
according to the
release notes are provided in the used version.
logi.cals
recommends to install and use the most current versions of
logi.CAD 3
and the runtime system so that the latest features and problem fixes
according to the
release notes are provided in the used version.
Did this article help you? Did you find the requested information in this user documentation?
If not, contact the support team of logi.cals. State your questions or suggestions to improve/enhance the user documentation as detailed as possible.