Assembling Raspberry Pi and detecting IP-address
Assembling Raspberry Pi
Attach PiFace onto the Raspberry Pi: Align all pins with the holes so that the PiFace can be slided onto the Raspberry Pi without problems.
Example for a PiFace attached to a Raspberry Pi (an SD card is inserted on the right as well):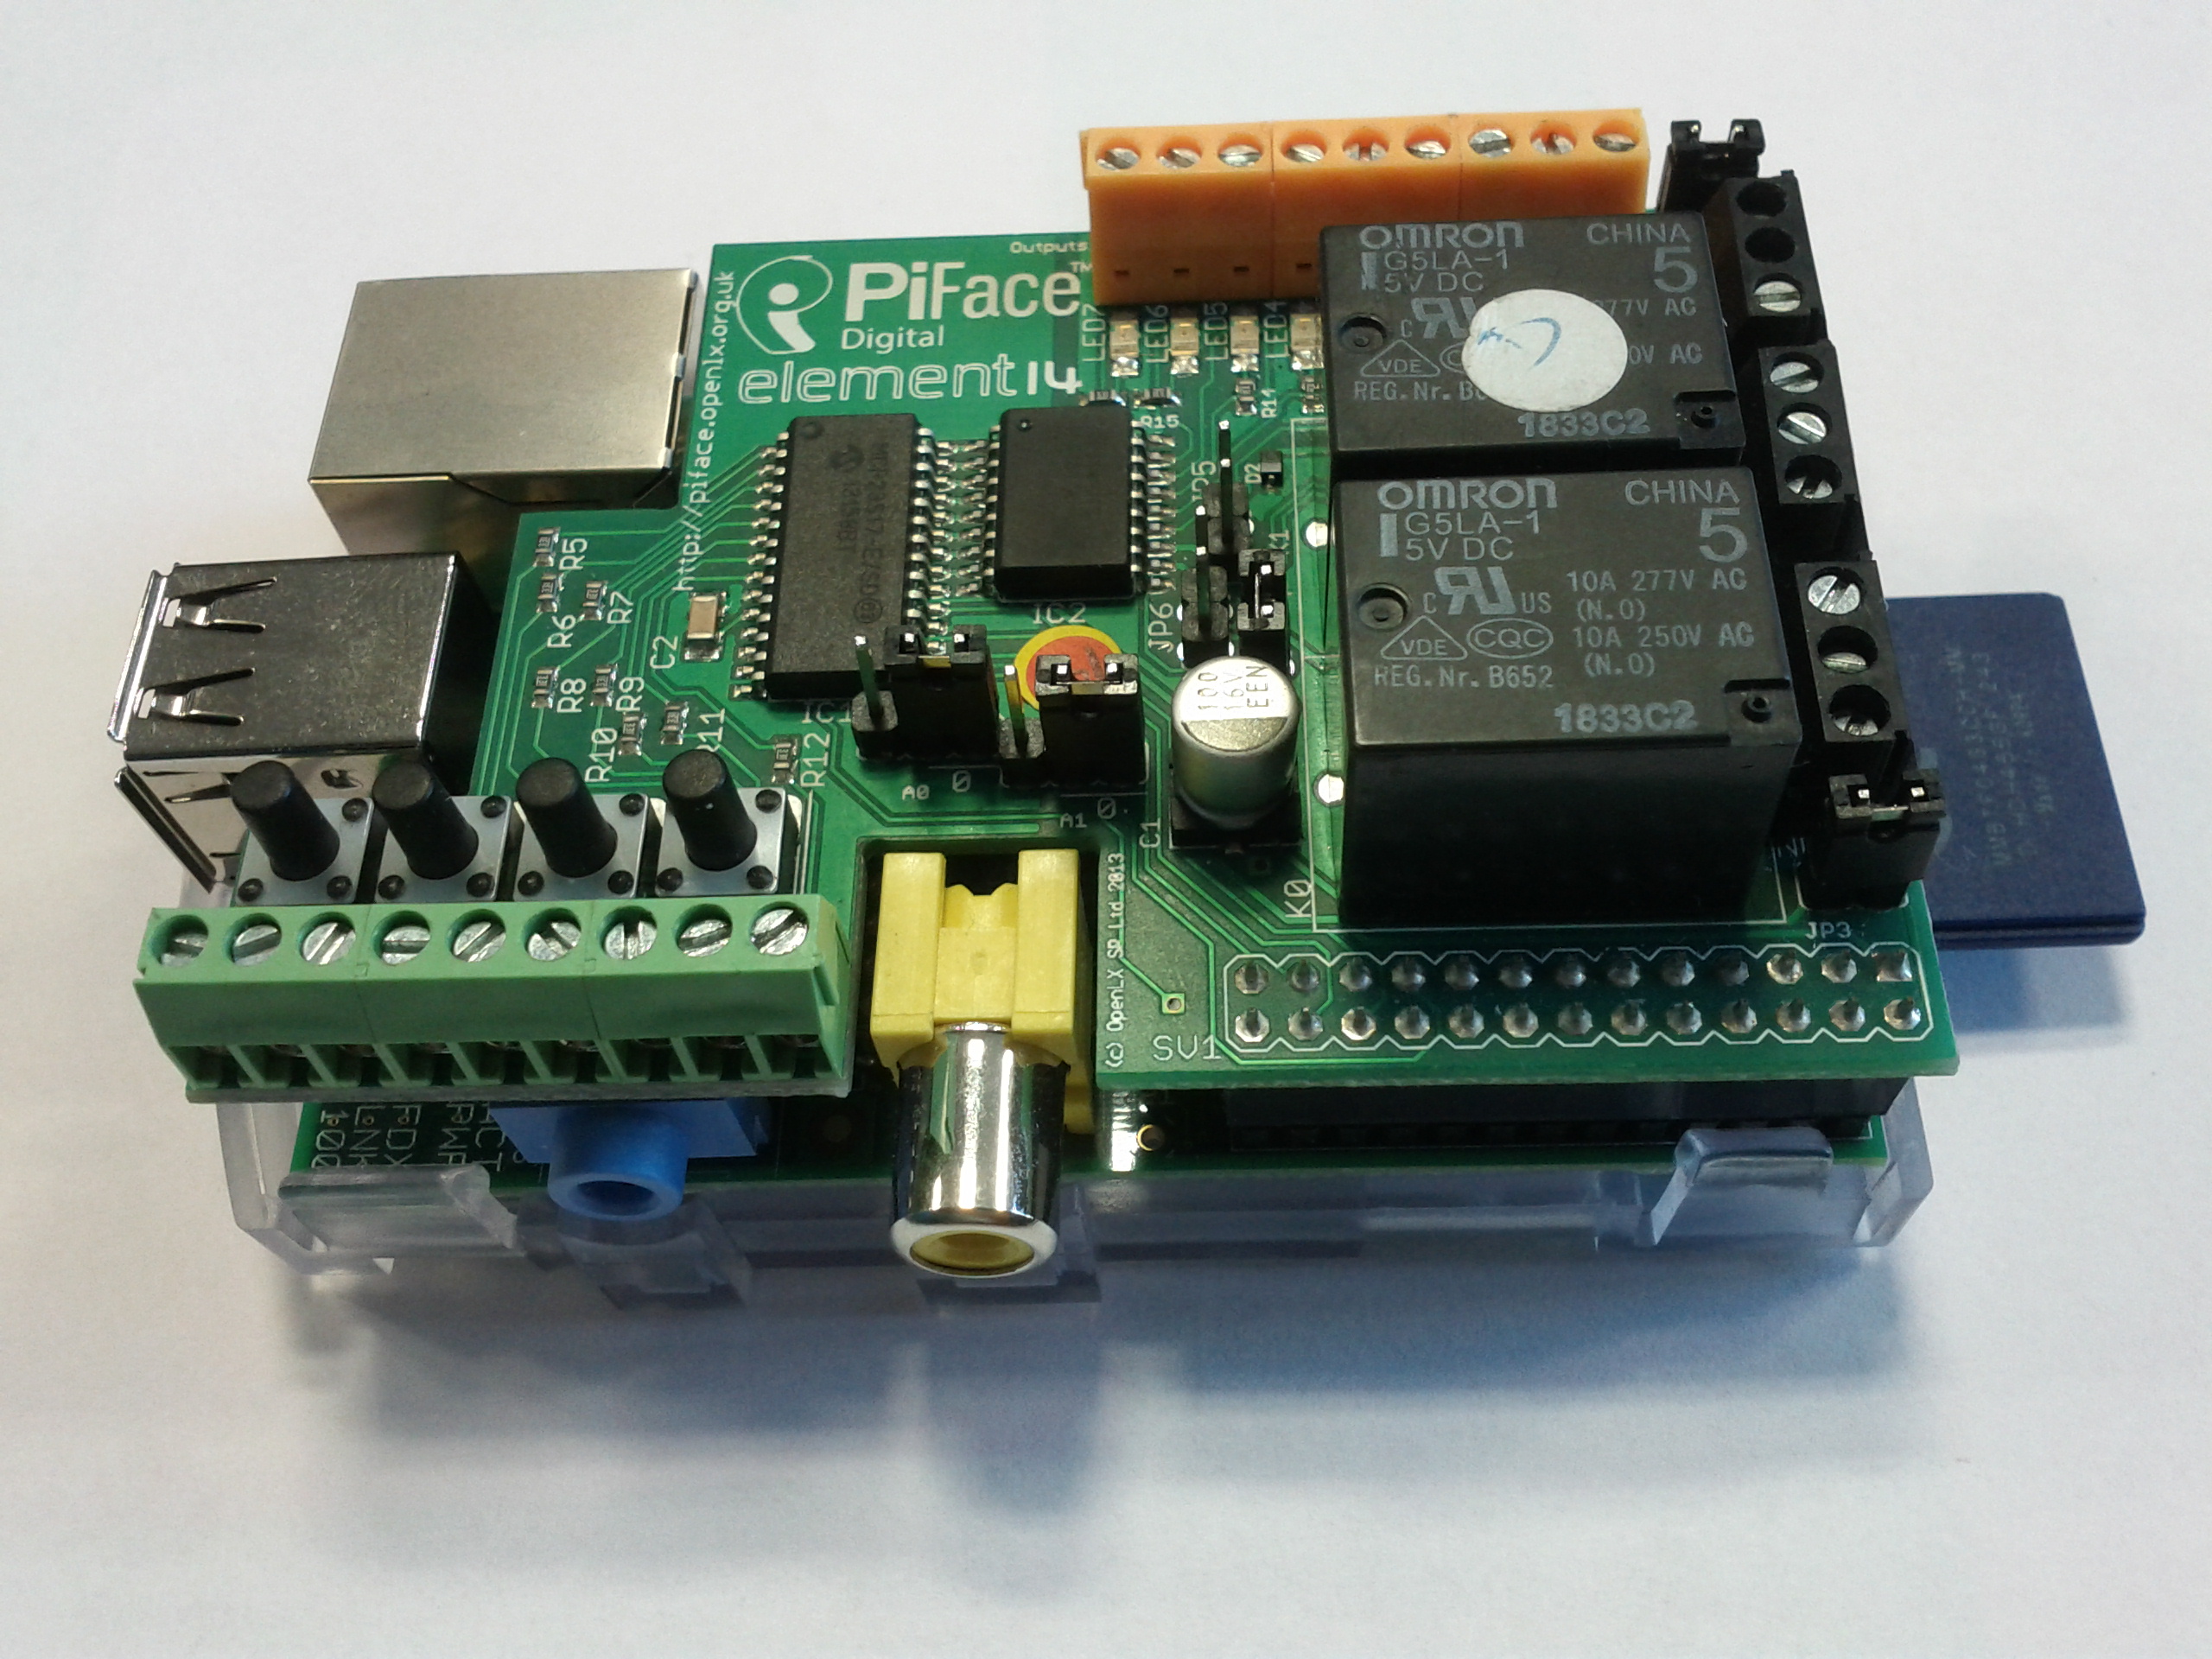
The Raspberry Pi is a 3.3 volt device. If you connect it directly to a 5 volt system, you might damage the Raspberry Pi.
The →GPIO pins of the Raspberry Pi do not have a built-in current limiter. By default, a GPIO pin can sink or source 16 mA at most. The 3.3 Volt supply can provide in total 50 mA at most. That means that all GPIO pins and possible custom circuits connected to the 3,3 volt supply must not consume more than 50 mA. Moreover, capacitive loads must not be connected directly to the GPIO pins because they cause current peaks.
Insert the SD card into the Raspberry Pi.
Connect the Raspberry Pi to the network.
Only now connect the Raspberry Pi to the power supply by plugging the power cable in. This starts the Raspberry Pi automatically from the SD card.
Detecting IP-address of Raspberry PI
Start Angry IP Scanner.
In this application, select the corresponding network mask resp. enter the corresponding IP-range.
Have these columns shown: Hostname, MAC Vendor, MAC Address and Ping (menu Tools, Fetchers, select the columns and click button <<)
Click button Start.
In the shown results, search for manufacturer Raspberr.
If there are several results with Raspberr but do have only one Raspberry Pi, previous Raspberry Pis might be displayed that are not active any longer. In such cases check which of the results has an active status.Note down the displayed IP-address of the active Raspberry Pi.
Close Angry IP Scanner.